
 From the factory the top loader NES-101 did not have a Light when powered on.
This frustrates many gamers. With this simple Upgrade you can have a lighted power switch.
From the factory the top loader NES-101 did not have a Light when powered on.
This frustrates many gamers. With this simple Upgrade you can have a lighted power switch.SAFETY:
Please take proper safety precautions when dealing with electronics and soldering. Always wear safety glasses, have proper ventilation and never perform repairs with item powered on! I cannot be held responsible for any damages that could occur to you or your equipment while following the procedures present on this WebSite.
Before starting take time and clean a proper work area. This upgrade requires patience a cluttered work area will not help you.
 |
| Super Bright LED I offer these for sale if needed. |
First step: There are four 4.5mm security screws on the bottom of the console. All screws will be represented as RED dots throughout this tutorial. Remove these and place the screws in a safe place. Next flip the console over and slowly remove the top plastic shell.

Now with the top shell removed you can see the motherboard & RF shielding. Remove all visible screws There are 3 gold tinted Phillip screws around the RF shielding and two silver screws at the cartridge slot.


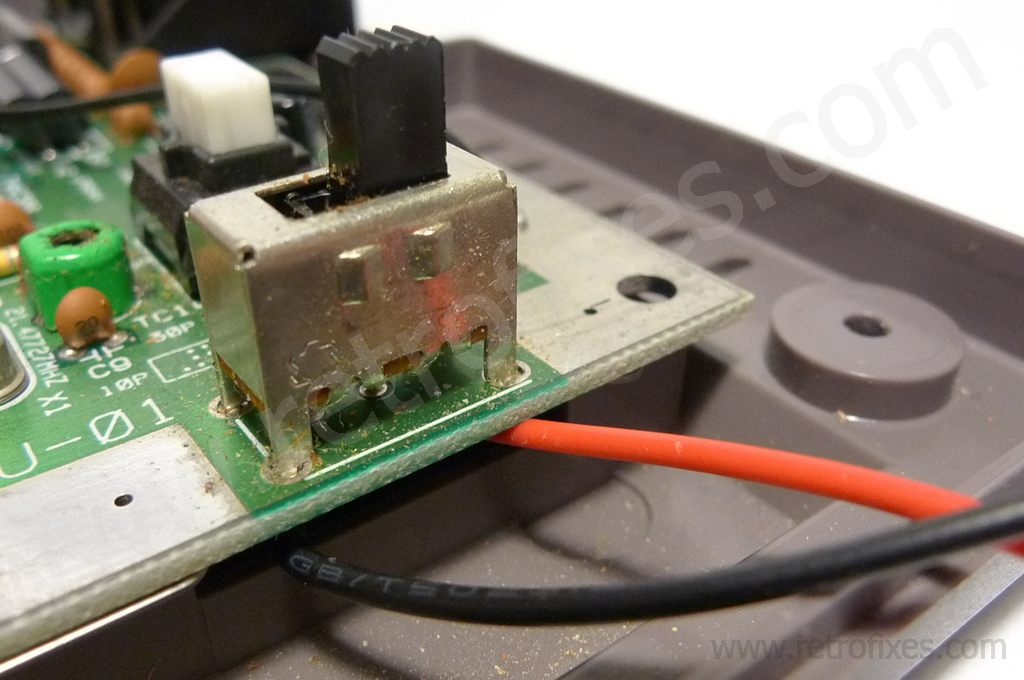
Now flip the motherboard over. All soldering will be performed on the bottom side. Carefully locate this area on the motherboard. It's the bottom legs of the Voltage regulator.


Solder the red wire (power) to the far right leg as shown.
Solder the black wire (ground) to the middle leg as shown.
Make sure the wires are not crushed when assembling the NES. The bottom shell has several small areas that wires can pass through. View photo above for example.

Next we can prep the top shell for the LED. Remove/unclip the power button and view the Dimple in the plastic. This spot is perfect for centering the hole.

Please drill carefully 3mm drill bit is needed for this hole. Watch for stress on the plastic and work slowly. Set the drill at the slowest speed.

Depending on the quality of the drilled hole you might need If the hole is too large use tape and secure the LED place.
When all the wires are secured in place assemble your NES. Pay close attention to the new wires when closing the body shell.

ENJOY!


I had no idea how to reach the RF shielding before now, thanks for sharing!
ReplyDeleteThanks for stopping by.
DeleteExcellent instructions. I used my own parts and found this tutorial very helpful. Thank you!
ReplyDelete